
Part 5 Specific Code on GitHub
If you search Google for Dynamics NAV item pictures you will find that there are a few examples out there for easily associating a picture with an item. However, there is not much on displaying multiple images for an item. This is a challenge I had to solve for my employer. Many items had anywhere from a single image to 10+ images.
I decided to come up with a .Net add-in control that was able to display multiple images for any given item and on any page (e.g. the item list, item card and beyond). I have decided to create a tutorial to show you how to create such a control. This will be quite lengthy, so I will split it up into smaller parts for you to digest more easily. The tutorial will be split into the following 7 part series:
- Part 1 – Introduction
- Part 2 – Creating the .Net image control model
- Part 3 – Creating the .Net image control viewmodel
- Part 4 – Creating the .Net image control view
- Part 5 – Creating the .Net add-in control wrapper class (this post)
- Part 6 – Creating the Dynamics NAV Item Images factbox page
- Part 7 – Hooking up the item Images factbox page
Part 5 – Creating the .Net Add-in Control Wrapper Class
Initial Preparation Notes
In this part of the tutorial we will be creating the add-in control wrapper (or host control; I will use both interchangeably) class. If you haven’t already, I suggest you grab the source code from GitHub, so you can follow along. This will also allow me to skip going through the folder structure and project setup and focus on the code itself. Any other preparation steps and notes can be found in Part 2 of the tutorial.
Adding Some References
Before we begin to add the wrapper class there are some references that we’ll need to add to our project. If you’re following along with the demo code from GitHub, you won’t need to do this. Otherwise, you’ll need to right-click on the project references, select Add Reference, select Assemblies and finally, Framework. On the far right side near the top of the References Manager, you can search and add the following assemblies:
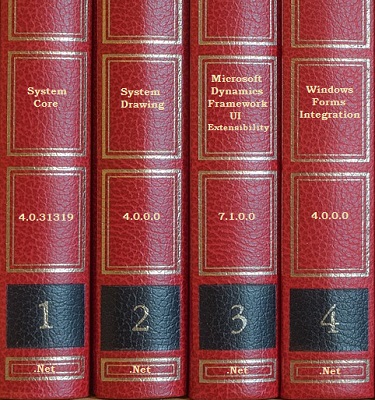
- WindowsFormsIntegration (v4.0.0.0)
- System.Windows.Forms (v4.0.0.0)
- System.Drawing (v4.0.0.0)
These assemblies will be required for various objects we will be creating. In addition to this, we also need a reference to Microsoft.Dynamics.Framework.UI.Extensibility (v7.1.0.0). If you have downloaded project from GitHub you will see that I have a lib folder holding the specific version of this file and have referenced that (this is my preferred way to reference external DLL files that need to be version specific). You can always reference C:\Program Files (x86)\Microsoft Dynamics NAV\71\RoleTailored Client\Microsoft.Dynamics.Framework.UI.Extensibility.dll, so long as you the Copy Local property is set to true in the properties for that reference.
MultiImageAddinHostControl Class
For this part of the tutorial, we are creating a single class called the MultiImageAddinHostControl class. This wrapper class will expose our WPF control functionality to NAV and respond to NAV requests in order to update our WPF control. You can think of the wrapper class as a mediator between NAV and our control.
Using Declarations
We’ll start with the required using declarations (namespaces) to make our WPF add-in control available and a few other objects we need to wrap it in a host control so that NAV can talk to it.
Inheriting From WinFormsControlAddInBase
The first thing we need to do is to inherit from the WinFormsControlAddInBase class. This class gives us a few things for free rather than having to implement the IWinFormsControlAddIn interface ourselves.
There are a few things to note here:
- I have added an attribute called ControlAddInExport, which allows us to give the official name of our add-in control (required for the client add-in table in NAV).
- We are required to implement the CreateControl abstract method.
CreateControl Method Implementation

This is the main guts to the implementation.
This method is where you create the WPF control, wrap it in a WinForms container, sometimes register events (in this case we aren’t going to) and then return the whole package for NAV.
Essentially we are constructing the bridge between Dynamics NAV and our .Net Add-In Control.
First we add a couple private member variables:
- ElementHost (this is the Windows Forms host container)
- MultiImageView (the View we created in part 4).
- PagableImageControlViewModel (the ViewModel from part 3).
Inside the CreateControl method, we instantiate our ViewModel, setting our PageSize property to 3 (via an Object Initializer). We then create our View, setting the DataContext property to our ViewModel. Next, we instantiate our ElementHost, set our View as the child (along with the Dock and Size properties). Finally, we return our ElementHost (to NAV).
Image Repository and Requests
In order for our images to display, we need an instance of an IImageRepository implementation. Our host control is not concerned with what type of implementation is used, so long as we can call RequestImages. I’ve decided to let NAV create the instance and assign it to our ViewModel.
First, we need a private IImageRepository member variable (this is added to the top of the class with the other member variables, but I have moved it with the relevant code for this code sample).
Next we expose a SetImageRepository method via the ApplicationVisible attribute. This will allow NAV to pass in an implementation of any IImageRepository. There are a couple things we are doing here:
- Ensure we are not passed a null object.
- If we had a reference to an existing IImageRepository, we unsubscribe from the RequestItemImages event to prevent memory leaks.
- Subscribing to the RequestItemImages event for the new IImageRepository.
- Passing the IImageRepository to the ViewModel.
The OnRequestItemImages method is registered as our delegate against the RequestItemImages event for the IImageRepository. When this fires, it takes the ImageRequestEventArgs from RequestItemImages event and forwards them to a new event we have exposed to NAV called RequestImages. In this case we pass a new object as the sender, because we don’t care about it. We are only interested in the event args.
That’s it for this part. Up next: Part 6 – Creating the Dynamics NAV Item Images factbox page. In part 6, we will compile the .Net control, register it with NAV and build a factbox page that houses it.